Pattern Making for Cut-Out Back Sports Bras: Common Pitfalls
A cut-out back sports bra that looks right on the pattern table can arrive from sampling with wavy edges, mismatched halves and an opening that no longer sits where it was designed to. These failures are not random. They follow from a small number of recurring pattern making and sewing mistakes, all of which are preventable if they are checked at the right stage.
Cutting the Hole Before Mapping the Load
The most consequential error is positioning the opening visually rather than structurally. Before any aperture is placed, tension lines must be drawn on the pattern. Fabric removed from a load path forces that load to detour, and it crowds at whatever seams remain. This is the root cause of the panel distortion that appears after twenty washes.
Ask to see tension lines on the working pattern during the first sample review. Most pattern makers will produce them on request; few volunteer them.
Ignoring Symmetry in the Marker
A rear opening is judged on symmetry, and cutting sequence determines symmetry. Where left and right halves are cut separately or where the fabric relaxes unevenly between cutting and sewing, a two-millimetre difference is enough for a consumer to perceive a fault. Require that both halves be cut together where possible, and set an explicit symmetry tolerance in the specification with inspection at AQL 2.5.
Grain Neglect
Stretch knits are directional, and the rear panel is often where direction is taken casually. Off-grain cutting produces garments that twist toward the opening after washing, which no pressing will fix permanently. State grain tolerance in the tech pack and check it at spreading.
Stretch During Sewing
Raw edges around an opening are longer and less stable than edges inside a panel, so they elongate under the feed dog. The result is a perimeter longer than the pattern specifies, and a subsequent problem joining it to a companion seam. Mitigations include stabilising tape on the curved sections, temporary spray starch during assembly, and operator training. Specify whether stabiliser is required rather than leaving it to the line.
Reinforcement Mismatch
Where stabilising tape, lining or binding is applied to the opening, its elongation must approximate the shell. A stiff reinforcement produces a hard visible edge; one that is too soft lets the perimeter grow. Require elongation figures for both components and compare them before approval.
Apertures That Ignore Movement
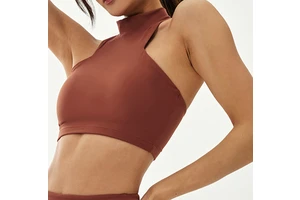
An opening edge that crosses the shoulder blade area will chafe during rowing, dance or overhead work no matter how soft the fabric. The large rear opening in this construction is deliberately positioned to clear that region. Verify it with live range-of-motion photography on three sizes, not on a static form.
Grading the Opening Naively
Finally, the aperture must be graded thoughtfully. Applying uniform grade increments moves the opening relative to the body, so what cleared the scapula in the base size may not clear it two sizes away. Review photographic clearance on both ends of the run, and adjust the aperture grade independently if the evidence requires it.