Pre-Production Sample vs Shipment Sample Comparison
The pre-production sample is the reference the whole order is measured against, and the shipment sample is the truth about what was actually made. Between those two documents sits every drift that occurs once bulk fabric arrives, cutting starts and the line changes speed. Most sourcing disputes are not about whether the garment is good; they are about whether it matches. A written comparison procedure, run on every order, settles that question in an afternoon instead of a month.
Establish the Reference Properly
The pre-production sample must be made from bulk fabric and bulk trims, in the correct size run, on the production line rather than in the sample room. Approve at least two pieces per core size, seal and sign them, and record their measurements on a measurement sheet before sealing. Keep one set at the factory and one set at the buyer, and photograph front, back, inside and all labels. A reference sample that exists only at the factory is not a reference; it is a suggestion.
Compare Fabric and Color
Check fabric weight in grams per square meter within plus or minus 5 percent of the approved sample and handfeel against the sealed swatch. For color, do not rely on the eye under warehouse lighting. Measure instrumentally under a light booth to ASTM D1729 or ISO 3668 viewing conditions, using D65 as the primary illuminant plus TL84 and a secondary source, and compute the difference by CMC per AATCC 173. A workable limit is delta E by CMC of 1.0 or less at a 2 to 1 lightness to chroma ratio. Where instrumental measurement is not available, rate against the gray scale per AATCC EP1 or ISO 105-A02 and require 4 or better. Compare panel to panel within one garment as well, because shade variation between front and back panels is a common bulk fault.
Compare Measurements Point by Point
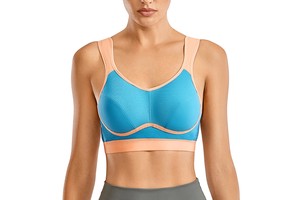
Measure the shipment sample against the approved sheet at every defined point, with the garment conditioned per ASTM D1776 or ISO 139. For a medium impact bra the critical points are underband relaxed circumference at each hook row, cup width and depth, front length from centre front neckline to band bottom, strap length at both adjustment limits, strap width, and the height and width of the back cut-out at its widest points. Suggested tolerances: plus or minus 5 mm on underband circumference, plus or minus 3 mm on cup and cut-out dimensions, plus or minus 1 mm on strap width, and left-right symmetry within 3 mm. Keep non-critical dimensions such as overall back length at plus or minus 10 mm so you do not pay for precision that does not affect fit.
Compare Construction and Components
Verify stitch density within plus or minus 1 stitch per inch, stitch type on every seam, seam allowance, edge finish on the cut-out, bar-tack locations, hook tape configuration at three rows by two columns with row pitch within 1 mm, pad pocket dimensions and pad specification, and all label text and symbol order. Confirm hardware gauge and plating color against the approved component. Any change to any of these, however small, requires a revised pre-production sample and a new approval; silent substitution is the single most damaging habit in bulk production.
Spot-Check Performance
Material and construction can be right while performance has drifted. Run a reduced wash cycle test per AATCC 135, a stretch recovery check per ISO 20932-1 or ASTM D4964, and a pilling check on the shipment sample, then compare against the development results. Recovery loss beyond 10 percent of the approved value is a reject even if every measurement is within tolerance.
Document the Outcome
Produce a comparison report with side-by-side photographs, the two measurement sheets, the instrumental color data and the performance results. State pass, pass with conditions or reject, and if rejected, state whether the remedy is rework, re-making or price adjustment. Retain retention samples from every shipment for at least twelve months. The next order will be compared against this one, and the file is what makes that comparison possible.